Last Updated: October 26, 2026
Quick Summary
An accessible bathroom remodel starts with the layout, not the fixtures: plan a 60 inch turning circle, 30 by 48 inch clear floor space at each fixture, and 30 to 36 inch transfer space beside the toilet. Match the design to the person and their mobility aid, then add reinforced wall blocking for grab bars.
- Horizontal grab bars belong 33 to 36 inches above the floor, with reinforced wood blocking behind the drywall.
- A curbless shower needs a sloped subfloor, a linear drain, and a waterproof membrane under the tile.
- ADA guidelines are commercial standards, not rules for a private home; local building code applies.
- Keep fixtures in place to control cost, since moving plumbing and walls costs more than swapping finishes.
- Start with low-cost safety changes like grab bars, a handheld showerhead, and a shower seat.
Table of Contents
- Start With a Wheelchair Accessible Bathroom Layout
- Match the Design to the Person and Their Mobility Aid
- Get Bathroom Grab Bar Placement and Wall Blocking Right
- Plan a Curbless Shower Design That Drains Correctly
- Choose Flooring, Fixtures, and Finishes for Safety
- Residential Code vs. ADA Guidelines: What Actually Applies
- What Drives Accessible Bathroom Remodel Cost
- Plan Your Accessible Bathroom Remodel With Corbett Construction
- Frequently Asked Questions
Start With a Wheelchair Accessible Bathroom Layout
The best accessible bathroom remodel design tips start with the layout, not the fixtures. Get the open floor space right and everything else falls into place.
A wheelchair accessible bathroom layout is a floor plan that leaves enough open room to turn, park, and move from a wheelchair to the toilet, shower, or sink.
Here’s what most guides get wrong: they hand you a product list before you’ve measured the room.
Clear Floor Space, Turning Radius, and Transfer Space
Three measurements matter more than any finish choice:
- Clear floor space: open floor you can roll onto without hitting a fixture. Aim for a 30 by 48 inch clear area at each fixture.
- Turning radius: the circle a wheelchair needs to spin. A 60 inch diameter circle is the target for a full turn.
- Transfer space: open floor beside the toilet or tub, usually 30 to 36 inches wide, so you can slide across.
Small bathrooms can still work. A pocket door saves the swing space a hinged door eats up. Moving the vanity to a shorter wall can free up a full turn.
Measure twice. Sketch it on graph paper. Then check it again with the actual mobility aid in the room.
Match the Design to the Person and Their Mobility Aid
A walker, a wheelchair, and a cane each need different things.
That’s the core of universal design: build for the full range of people, not one average user.
Here’s how needs shift by user, with the dimensions that actually change:
- Cane or walker: grab bars and a stable shower seat matter most. A 30 by 48 inch clear floor space at the toilet and shower is usually enough. Full 60 inch turning room is helpful but less critical, because a walker can pivot in place. Prioritize continuous grab bar runs and a seat with arms.
- Manual wheelchair: turning radius and transfer space become non-negotiable. Plan a 60 inch diameter turning circle, a 30 by 48 inch clear floor space at each fixture, and a 30 to 36 inch wide transfer area beside the toilet on the side the user transfers toward. Doorways need at least 32 inches of clear opening.
- Power wheelchair: wider doorways and more open floor, since these chairs turn in a bigger arc and have a longer wheelbase. A 36 inch clear opening and a 60 inch turning circle are the practical minimums; some chairs need more. Confirm the chair’s actual footprint and turning radius before finalizing the plan.
A common pattern is to design for the most demanding user first, then confirm the result still works for everyone else.
If you’re planning for a parent’s needs, the bathroom is one piece of a bigger picture. Our team at Corbett Construction handles aging in place remodeling that ties bathroom, kitchen, entry, and flooring changes into one plan.
Here is how the key dimensions shift depending on who uses the bathroom and what mobility aid they rely on.
| User | Key needs | Dimensions that change |
|---|---|---|
| Cane or walker | Grab bars and stable shower seat with arms | 30 by 48 inch clear floor space; 60 inch turn less critical |
| Manual wheelchair | Turning radius and transfer space non-negotiable | 60 inch turning circle; 30 to 36 inch transfer area; 32 inch doorways |
| Power wheelchair | Wider doorways and more open floor | 36 inch clear opening; 60 inch turning circle minimum |
| Caregiver-assisted | Room for two people, fold-down seat, handheld showerhead | 5 by 5 foot clear area in the shower |
| Limited reach or balance | Controls and storage reachable without stepping or twisting | 15 to 48 inches from the floor |
Get Bathroom Grab Bar Placement and Wall Blocking Right
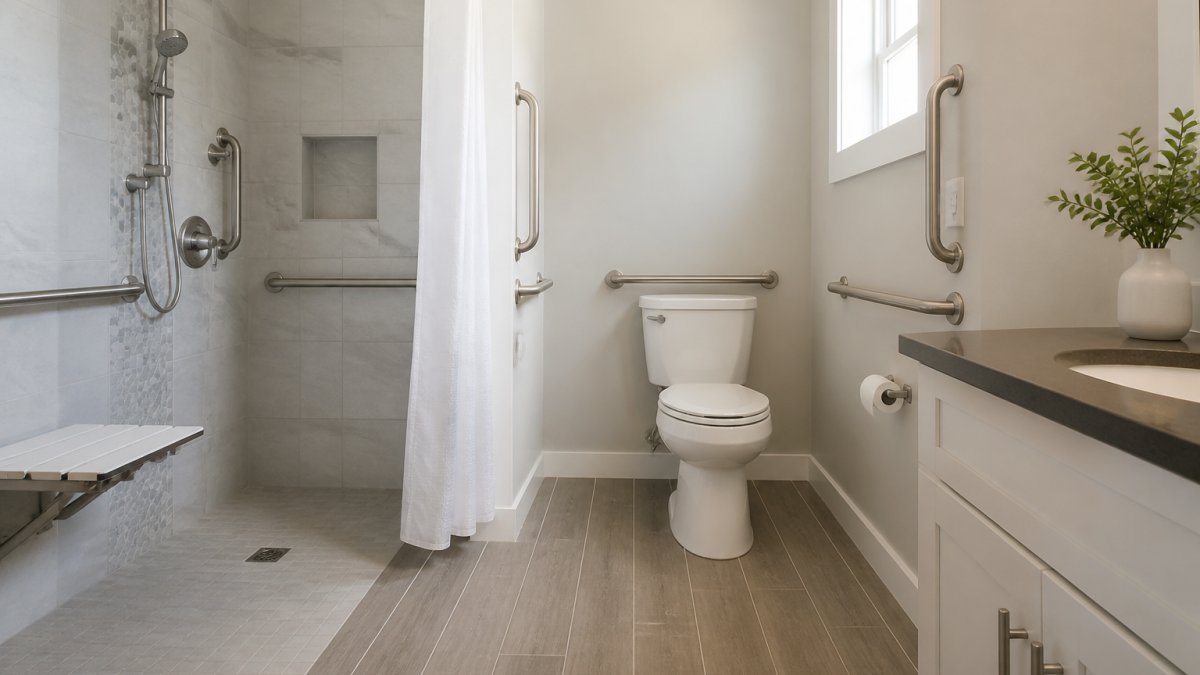
Correct bathroom grab bar placement puts bars where hands actually reach under load, not where they look balanced.
The blocking is the part nobody sees and everybody regrets skipping. Reinforced wall blocking is wood framing installed inside the wall before tile goes up.
Where bars belong:
- Beside the toilet, horizontal, at seat height
- Behind the toilet, for a backward push
- Inside the shower, plus a vertical bar at the entry
- Along any step or threshold
Watch out: mounting a bar into drywall anchors alone is the most common and most dangerous shortcut. Open the wall and add blocking.
Plan a Curbless Shower Design That Drains Correctly
A curbless shower design removes the raised lip at the shower entry so a wheelchair or walker rolls straight in. The catch is drainage.

A roll-in shower needs a sloped subfloor, a linear drain at the edge, and a waterproof membrane under the tile.
Other bathing options have trade-offs:
- Walk-in bathtub: a door that seals and a built-in seat. Good for soaking, but you still step over a low threshold and wait for the tub to drain before exiting.
- Tub-to-shower conversion: opens floor space and removes the climb-over wall entirely.
- Curbless shower with a fold-down seat: the most flexible option for mixed abilities.
A shower seat, handheld showerhead, and lever-handle controls belong in every version. Put the controls at 38 to 48 inches so they’re reachable from a seated position.
Choose Flooring, Fixtures, and Finishes for Safety
Slip-resistant flooring is the single biggest safety upgrade in an accessible bathroom. Look for tile with a textured or matte finish, and keep grout lines narrow so a walker or wheelchair wheel doesn’t catch.
Traction matters more when the floor is wet. So do these:
- Comfort-height toilet: 17 to 19 inches from floor to seat, easier to sit down and stand up.
- Accessible sink: open space underneath for knee clearance, so a wheelchair rolls under.
- Lever-handle faucet: one hand, no gripping or twisting.
- Adjustable shower controls and scald prevention: a pressure-balancing valve stops temperature swings.
For a closer look at finishes that hold up to daily use, see our rundown of bathroom remodel upgrades for Kitsap homes, covering waterproof showers, durable floors, ventilation, storage, and lighting.
Residential Code vs. ADA Guidelines: What Actually Applies
ADA guidelines are commercial building standards, not rules for a private home. That surprises a lot of homeowners, and it changes how you plan.
According to the ADA National Network’s guidance on the Americans with Disabilities Act, the ADA covers places of public accommodation and commercial facilities. As The Home Depot’s accessible bathroom guide puts it, the ADA does not set rules for residential construction.
So what does apply? Local building code, which governs things like door width, ventilation, and plumbing.
Check with your local building department before you draw plans. Rules vary by jurisdiction, and a permit review will tell you what’s actually enforced.
What Drives Accessible Bathroom Remodel Cost
Accessible bathroom remodel cost depends on how much you move and how much you open up. A grab bar install is a small job. A curbless shower with a re-sloped floor and new waterproofing is a bigger one.
The big cost drivers:
- Layout changes: moving plumbing and walls costs more than swapping finishes. Relocating a drain or supply line means opening the floor or wall, re-running pipe, and patching and tiling. Keeping fixtures in place is the single biggest cost lever.
- Shower conversion: re-sloping the floor, adding a linear drain, and waterproofing. This is the highest-value accessibility upgrade and also the one most likely to require a permit and a skilled tile setter.
- Wall blocking: opening walls to add framing, then patching and tiling. Cheap if done during another project, expensive as a standalone job because of the patch-and-match work.
- Fixtures and finishes: comfort-height toilets, lever faucets, slip-resistant tile. These are mostly material costs and are easy to phase.
A prioritized, phased plan usually looks like this:
- Low-cost safety changes first. Grab bars with proper blocking, a handheld showerhead on a slide bar, a shower seat, a non-slip mat or coating, and brighter lighting with contrasting trim. These address the most common fall risks and can often be done without a permit.
- Fixture swaps next. A comfort-height toilet, a lever-handle faucet, and a pressure-balancing valve. These are moderate-cost, low-disruption changes that improve daily use.
- Then the shower conversion. A curbless or roll-in shower with a linear drain, waterproofing, and a fold-down seat. This is the phase that usually requires opening the floor and pulling a permit, so it’s the one to plan carefully and budget for.
- Structural and layout work last. Moving walls, widening doorways, or relocating plumbing. Do this only if the earlier phases can’t deliver the clearances the primary user needs.
Phasing helps. Start with grab bars and a handheld showerhead. Add the curbless conversion when budget allows.
We don’t publish fixed prices because every room is different. For a realistic look at what a project involves before demo day, read our guide on how to prepare for a bathroom remodel covering budget, timing, materials, and daily life during construction.
Plan Your Accessible Bathroom Remodel With Corbett Construction
The hardest part of an accessible remodel isn’t the tile. It’s getting the measurements, blocking, and drainage right the first time.
Corbett Construction is an Indigenous-owned business established in 2019, led by owner Denver Corbett.
If you’re not sure what to ask a contractor, our guide on how to hire a bathroom remodel contractor covers the questions and expectations that matter.
Ready to talk through your bathroom? Visit our kitchen and bathroom remodeling services to discuss your renovation, or reach out and let’s talk about what your space can become.
Frequently Asked Questions
What features should an accessible bathroom have?
The core features are a step-free entry, a curbless or roll-in shower with a fold-down seat and handheld showerhead, grab bars anchored into reinforced wall blocking, a comfort-height toilet with transfer space beside it, slip-resistant flooring, and a lever-handle faucet within easy reach. Clear floor space for turning and a doorway wide enough for the user’s mobility aid matter as much as the fixtures. Build the layout around the specific person first, then choose products that fit it.
How much space is needed for wheelchair access in a bathroom?
Plan for a 60-inch turning circle inside the room so a wheelchair can rotate fully, and keep a 30-by-48-inch clear floor area at each fixture. A shower should be at least 36 by 36 inches, with 60 by 30 inches preferred for a roll-in design. Doorways typically need 32 to 36 inches of clear width, which often means a pocket door or an outward-swinging door in a small bathroom layout. Confirm measurements against the user’s actual wheelchair before framing.
Are walk-in showers better than tubs for accessibility?
For most people using a wheelchair or walker, a curbless shower is the safer choice because there is no threshold to step over and no tub wall to climb. A walk-in bathtub suits someone who wants to soak and can still sit and swing their legs over a low door, but it requires more floor space and careful drying. Many remodels pair a roll-in shower with a separate tub if the room allows. The decision should follow how the person bathes today and expects to in five years.
Can an accessible bathroom still look modern?
Yes. Accessibility comes from dimensions, blocking, and drainage rather than clinical fittings. Large-format slip-resistant tile, a linear drain, a floating vanity with open knee clearance, and a frameless glass panel over a curbless shower all read as contemporary design. Grab bars in finishes that match the plumbing fixtures blend into the room. The trick is deciding the accessible layout first, then treating the finishes as a normal design project so the result looks intentional rather than medical.
An accessible bathroom starts with a plan, not a product list. If you’re ready to get the layout, blocking, and drainage right, Corbett Construction can help. We bring direct communication with Denver, careful framing and finish work, and a clear scope from day one. Get started with Corbett Construction and build a bathroom that works for everyone in the house.

Leave a Reply